Many of us love to create something with our own hands, including interior items. In order to diversify the decor and add new details to the comfort of your apartment, you can knit a carpet, sew a fashionable bedspread or decorative pillowcases, or paint a landscape. Or you can resort to a form of creativity such as pyrography, or simply wood burning. If you're not good at painting, this option is just for you because you can find a lot of wood burning stencils online. You just need to download them to your computer, print them, cut them out and transfer them to wood.
Anyone can use this simple method of applying a design to wood; it is suitable for both children and adults. However, you can come up with sketches yourself, but this can be done by people with a rich imagination or experience. Therefore, we suggest you use templates.
Progress
It is best to use soft and light wood species for burning, these include poplar, birch, and chestnut. The surface must be sanded with sandpaper, treated with furniture varnish and sanding repeated. This way you will avoid unwanted splinters getting into your fingers or your child’s fingers.
You will also need a pyrograph. This is an electric burner and can be purchased at hobby and craft stores. These stores also sell special kits for wood burning; they usually already include a pyrograph, a wooden block, and the drawing itself, which you will use as a stencil. For beginners, it is better to choose just such a set to try your hand at a new business, especially since it includes everything you need.
Make sure the board is dry and that your hand has something to rest on as you work. Support is very important because one wrong move can ruin the entire design or, even worse, the hot tip of the pyrograph can burn you. The hand must stand firmly.
Then draw the design using a pencil. If you are using a stencil, simply trace the outline of the cut out design. If the picture you choose is multi-layered, that is, it includes additional details (for example, hair, eyes, facial features or muzzles), then it is better to use carbon paper or tracing paper.
Advice for beginners: choose fairly simple and easy subjects for paintings until you get the hang of it. It’s better to do it simpler, but more effectively, than to take on an impossible task.
It is not entirely correct to put all the stencils under the same comb, so we divide the ready-made templates into different categories.
Create letters
Letter stencils are ideal for creating lettering on wood. For example, on cutting boards or any other wooden panels with congratulations.
Beginning pyrographers can practice their skills by first burning out letters, then whole words and sentences. You can download a whole set of different fonts to suit every taste.


Bright flowers
Flowers are a known antidepressant, whether real or painted. Now there are even special anti-stress coloring books depicting various floral patterns of any complexity. You can use this coloring book, or you can download the desired picture on the Internet. Beautiful flowers will always cheer you up!
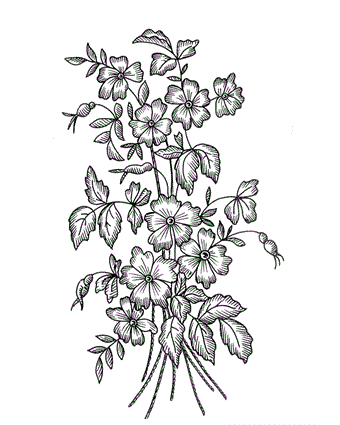

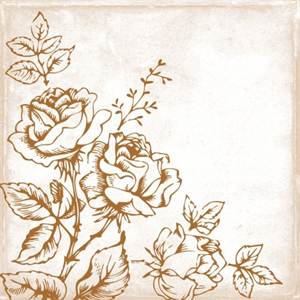


Such works can be painted with acrylic or watercolor and then covered with wax to preserve the colors.
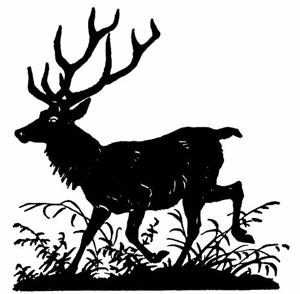
Outline animals
Animals depicted on a tree will perfectly complement the houses in which pets live, because you can transfer an outline image from a photograph of your pet onto the tree and burn it. It can also be a stylish gift for animal lovers, hunting lovers or professional breeders.


Holiday drawings
These can be any holiday motives: New Year- Santa Claus with reindeer, gifts, Christmas tree, snowflakes and so on. For Easter - Easter eggs, various Easter patterns will look especially great on wooden eggs. For Defender of the Fatherland Day, you can burn military equipment or shoulder straps, and for March 8, bouquets of flowers.


Good day, brain artisans! Today I will share my experience in the field of wood burning or pyrography, using which you can with your own hands create a real masterpiece!
Burning tool


You can choose any tool for pyrography: from cheap to expensive. My first burner was from a supermarket, it came with 5 different attachments and, in principle, it did its job perfectly. But over time, I began to use it only for filling in the background, since after many hours of working with it, it begins to slowly “fry” my fingers, and the tip becomes so hot that accuracy is lost.
So I purchased a professional brain instrument pyrograph, with the ability to adjust the heat of the tip, which is very convenient when using different types of wood and creating different shades. And of course, the big plus is that you don’t have to wait for the burner tip to cool down before changing it to another.
Material for pyrography


First, let me note that it is necessary to have a hood or fan when burning, but do not direct the air flow to the burner so that it does not cool.
— MDF: Not the most beautiful material, but I had it in large quantities. The material is hard, so it requires more heat; There is no grain, which allows you to draw more clearly and without errors; when doing a gradient it gives a nice golden sheen, but sometimes a lifeless grayish glow. Important! Since MDF is compressed-glued wood dust on a formaldehyde basis, a hood is required!
- pine: cheap and widely available material, soft, easily burned. The grain makes you play with the temperature of the heat and pressure on the tip, the resins give the craft a varnish shine.
— cedar: soft material, grain does not cause trouble, lines appear well, but the gradient is hardly noticeable.
— cherry: it smells great when working :) I've only worked with it once, but the quality is excellent.
Another note - never burn on surfaces that have been treated with anything (varnish, paint, etc.)! This will cause fire or poisoning.
Drawing contours


For my first homemade products I applied the contours painstakingly, by hand, believing that tracing paper or templates were not acceptable, that this was a kind of deception. But when I realized that customers did not appreciate this, that this was a moment of little concern for them, I began to apply the drawing using black tracing paper. It is the black and blue ones that cause a lot of unpleasant trouble.
The trick: some pyrographers apply a design using thermal transfer paper by printing the design on a printer and “transferring” it using a warm iron. But this method can cause overheating of the material even in volumetric homemade products The proportions of the drawing may be lost, and distortions may appear. But there is such a way.
Burning contours


To pass the contours, I use a spear-shaped tip with heating 7/10 for MDF and 5/10 for pine. A sharp tip makes it harder to keep the lines smooth, and it also leaves quite a furrow, but I like it. The ball sting does not penetrate deeply into the wood and allows you to burn lines in different directions.
Trick: Try to burn the outlines with one brain sketch, in one fell swoop, but move the tip slowly, as you may scratch the wood rather than burn it. With long lines, you can move not only the hand with the burner, but also the material itself.
Fill


Filling surfaces is easier than creating a gradient, but also looks good. For larger volumes, I recommend a flat tip with medium to high heat. For small areas I use a calligraphic pen, which also gives high quality.
Trick: Do not try to fill surfaces quickly and at excessively high temperatures, as this will ruin the homemade, leaving deep black scars-furrows on the tree. Work at medium temperatures using gentle circular motions.
Golden trick: When you first touch the wood, blow on the tip of the sting, this way the black starting point will not be visible when making circular movements, and the start will be smooth.
Gradient


To create a gradient you need less heat, more patience and precision in hand movements. To achieve a gradient effect, I use a flat tip with a 4-5/10 heat setting.
The gradient itself is applied in a circular motion over a small area; no changes are visible during the first pass, but passing over part of the area a second time, this area becomes darker.
Important: for large grains/fibres brain stuff Treat coarser fibers at a higher temperature than when applying the entire gradient.
Hatching


Hatching and cross-hatching give excellent results and sometimes they are even better than gradient, for example, with very high fibrous material.
For shading, I use the same tips as when drawing simple lines, for example, a spear-shaped sting. Start shading in one direction, always from the edges, so the edges will be darker than the inside. To do shading crafts darken in some places, apply cross-hatching.
Textures


Various textures come out well when burning, I’ll tell you about some:
- Scalp hair: For crazy 80's style hair (see Kiss) or just a little messy (see AC/DC), use a high heat flat tip. At the same time, do not try to make the lines smooth and flowing, this way you will achieve volume of the hair. Vary the shades by how much you press the burner, or leave unburned areas as highlights.
- fur: with a thin tip, sharp or round, you can create an amazing fur effect. In dark areas of fur, use a larger one brain heating both pressure and light, quick strokes in light areas. If the fur is too angular and crisp, go over it with a flat tip and refine the texture.
- scales and skin: use sharp and broken lines to create this texture. This will give a cracked effect, and use the flat tip to create shadows to add volume. For this texture, do not use shading, otherwise you will end up with a furry dragon :)
Background


After burning the main design, it is necessary to supplement homemade background, this is especially true when working with cheap and low-quality wood. My following tricks will help you with this:
— rust: the easiest way to apply rust is to “scrape off” the rust from old bolts and pieces of iron with ordinary brain sandpaper, and then apply the resulting brown powder to the homemade product. I do this with my finger, but the cotton swab version works too.
I often use this effect on MDF to remove excess shine and add realism.
- fan: using a regular movable fan that smoothly directs the flow to different corners of the room, you can create an amazing vignette effect. Just point it at your homemade product and begin to smoothly burn out the lines of the design; the effect will not appear immediately, but you will definitely see it. The point is that the flow from the fan periodically cools the tip, thereby the same line has different blackness along its length.
Be careful when working close to brain ventilator! I somehow forgot myself and got a decent burn when the fan hit the burner.
- shading: when the design requires a completely black background, or when you have patience, or the amount of shading is not large, then you can use a flat tip at high temperatures or use a gradient technique. But at the same time, be sure of the final result, otherwise everything will end in a waste of time and material.
- pointing or "dot": this is an old technique used in many medieval works of art. The idea is to simply heat an iron template, such as a bolt, and “brand” it repeatedly. homemade products. Now a sick round tip is suitable for this, which needs to be heated sufficiently and periodically cleaned of carbon deposits. When working with soft wood, this technique allows you to create a contrasting pattern and textured background.
If you liked my craft, then buy a burner and feel free to plunge into the world of art called pyrography.
Successful brain masterpieces!
With the help of wood, humanity has learned to create the most beautiful products. And all because this material is rich in its functionality. Durability, strength and, at the same time, softness - these are the very qualities of wood that are necessary for pyrography.
- what is fire painting?
- drawing technique;
- work technology.
What is fire painting?
 Pyrography is the burning of an image onto wood., which is not given to everyone. This type of art is distinguished by wood carving not only by the main tools, but also by the complexity and technique of executing the designs that the master wants to make.
Using a burner - a drawing tool - you can create unique patterns, images or drawings. This device consists of a metal pen with which a drawing is applied. And a handle that attaches to the pen. In order to be able to draw lines of different thicknesses, the pen can be changed, since it consists of nichrome wire. Most often you can see entire sets or sets of burners. Which contain several attachments in the form of a metal pen.
In addition to the thickness of the pen for the burner, there are also hard and soft feathers. The latter are most often called wire ones, since they have a very useful function. Their essence lies in the fact that with the help of wire feathers you can change the heating temperature. This allows you to draw lines of varying intensity. Hard feathers serve more for background burning and do not know how to switch the heat. Using pens of different thicknesses, you can not only apply the contours of a design to the wood, but also tint the work, give it volume and perspective, making strokes with a burner pen that imitate a pencil or charcoal.
The burner works quite simply because after turning it on, the pen heats up to a certain temperature and at this moment the first elements of the image can be applied. But as with all electrical and any other devices, the burner must be handled very carefully, since it is not difficult to get burned on the wire.
To create such a fake, you need to choose only soft trees. For example, birch, alder, poplar or chestnut. By the way, it will be most convenient to apply images on well-dried birch plywood, for example. After the plywood has dried sufficiently, it must be cleaned or exfoliated so that the surface on which the drawing will be placed is sufficiently smooth.
Pictures for burning can be very different - someone will burn out Russian motifs - Gzhel or Khokhloma, someone will burn the silhouette of a ship and seagulls, for others the heroes of computer games will serve as inspiration.
Gallery: patterns for wood burning (25 photos)


Drawing technique
Wood burning patterns include several technologies that will be understandable even to novice masters:
- Standard method.
- Negative method.
 If a novice creator wants to resort to the first method, then in this case you need to select a sketch of the drawing in advance. After the sketch is ready, you need to burn the drawing strictly along the contour, transferring the drawing from the sample to the wood. Thanks to this method, several burning methods can also be used. For example, apply patterns in the form of strokes or make a drawing using the dot method.
The negative method is mainly used by professionals, since it is used quite the opposite. That is, the master uses light shades of wood (the untouched part) as elements of the design. And then the background is burned out. In addition, professionals work in this way in the case of complex designs and patterns.
But there are also two more methods that are popular for their functionality. The first method is performed in the same way as the negative method, but with a sketch. And the second is combined with wood carving. Thus, it turns out that first the entire background is burned out, and then the patterns are cut out. The second method is popular among beginners who are just learning this technique.
And you can also notice from some masters such a method as a relief pattern. It also includes drawing and wood carving. To begin with, the master transfers the sketch onto prepared plywood, and then, using a cutter, he adds volume to the image.
Work technology
Wood burning has become a fairly common activity that requires perseverance, accuracy and imagination. In order to fully understand how the process of fire drawing occurs, we decided to give short instructions.
So, first, you need to cut out some parts using a jigsaw and sandpaper and thoroughly clean the surface. After this, the patterns prepared in advance you need to redraw it on a sheet of paper by hand or using carbon paper. Then a suitable pen is selected, attached to the handle and burned along the contour of the patterns.
Next, the background is retouched, which also requires care. In this case, a different pen is used; most often, craftsmen choose feathers for retouching. As soon as the surface has cooled down from high temperature, you need to use an eraser to clean the plywood from all sorts of imperfections in the form of dust or soot. After all the above has been done, for durability, you can coat the surface with clear varnish.
Pyrography, also known as the art of wood burning, is gaining more and more popularity every day among people of all age groups and categories. One of the reasons for such an unexpected surge of interest in wood burning, we believe, is the emergence of new, simple and safe to use tools - pyrographs. Paintings created specifically for burning on any wood are an excellent gift for any celebration, made with love by your own hands. The person who gives you such a gift shows the full strength of his love and attention to you, because it will take him at least several hours to make one such work.
How to choose a tool and wood for making scorched paintings:- Wood burning is an art that does not require any expensive, hard-to-find tools and materials. As a burning tool for beginners A very ordinary soldering iron may be suitable, which has the shape of an ordinary writing pen, a little larger in size than what we are used to, which means you will simply trace the lines of a pattern previously applied to the base material. Some people use nails heated with a flame from a lighter or torch as a pyrograph, which are held with the heads of pliers. Such the method will work not everyone. The ideal option would be a professional pyrograph or the most budget-friendly equivalent - a burner, which you can purchase at any specialized store.
- Images for such paintings do not need to be drawn by hand with a pencil, it is enough download a picture you liked on the Internet, print and transfer it to the tree. You can transfer a drawing to wood using black graphite paper; unlike regular carbon paper, it can be easily erased if necessary and retains the accuracy of the image lines when heated. Some people print the design on thin parchment paper, glue it to the wood and then burn it. The heat melts the paper, and the excess is then easily removed. At first, choose lungs patterns and ornaments that will help you improve your skills and hone your burning skills.
- It is better for young burners to take wooden blanks cut from soft, easily processed trees, with a uniform fiber structure. Wood from trees such as poplar, aspen, and linden is suitable for this. Small workpieces – great start for beginner pyrographers. Do not forget to sand the surface of the board with fine-grained sandpaper immediately before work. Instead of wooden planks cut on your own, you can use inexpensive and commonly available plywood, because it does not have a pronounced structure and can be easily burned out.
We are exploring options for paintings for wood burning
It is better to take simple sketches for the first works, with a minimum number of lines and strokes. After you notice that such sketches are already quite easy for you, and their completion takes much less time than at first, it’s time to start burning more complex paintings, for example, depicting animals, nature, and sometimes people .
Famous pyrographers draw their inspiration from everything that surrounds them, but the most popular are the images using fire on a wooden base of animals, birds, nature, and less often people, some unusually complex ornaments consisting of many small details. You can see all this in the photos below.

Julia Bender's paintings are filled with small details and play of shadows. Small strokes with the metal tip of a pyrograph convey every, even the smallest hair of the animal. The feeling that you are looking at a photographic image will not leave you until the very last seconds. But no, all these beautiful animals are made using the technique of burning wood with a red-hot pyrograph.
Peter Walker burns his paintings onto surfboards. Its bright patterns are a mixture of animal and plant life, flavored with rich blue shades. In some of his paintings, traces of flames are intricately intertwined into colors on the skin of exotic animals.

Rick Merian has been doing woodburning relatively recently. The main themes of his images are movie characters from the most famous and popular films/series and tattoos that he saw on the bodies of those around him. I think you can easily recognize many of the faces in the scorched paintings.

Video on the topic of the article
In conclusion of the article, we would like to invite you to familiarize yourself with a small selection of video clips in which you will see how children and adults burn out simple and not so simple images using metal and flame.
Wood is an extremely grateful material. Tough enough to be durable, hard enough to hold even very thin shapes, soft enough to allow processing with simple hand tools.
Therefore, there are many methods for decorating wooden products. For example, patterns and drawings on wood.

The concept of pyrography
Wood burning or pyrography is a fairly simple activity, but at the same time it provides a quick and beautiful effect. In terms of its technology, pyrography is easier to perform than, for example, carving, although, of course, here too much depends on the complexity of the pattern and execution technique.

Patterns for burning wood are made with a special device - a burner. It is a metal pen attached to a pen. The pen is made of nichrome wire of different thicknesses, which allows you to get lines and dots of different diameters. As a rule, burners are equipped with a whole set of attachments used for pyrography.

There are devices with hard and wire feathers. The former have a constant heating temperature and are more often used for background cauterization. In burners with wire pens, the heating temperature can be adjusted, which allows you to obtain lines of different intensities.

When the device is turned on, the pen heats up to a fairly high temperature and burns through it when it comes into contact with wood. When working, you must follow safety rules, since it is very easy to get burned on the wire.

Relatively soft wood is used as a material for crafts: birch, chestnut, poplar, alder. Very good results when creating a pattern are obtained on plywood, especially birch. A prerequisite: the wood or the same plywood must be very well dried.

In addition, to obtain a high-quality ornament or design, you must first sand the material. The surface of the craft should be completely smooth.

Pyrography technique
There are several different techniques that allow you to obtain a drawing or ornament from a sketch.

It is better for a beginner to start with the simplest and most standard ones.
- The standard technique involves transferring a sketch of a pattern onto a tree and burning it along the contour. In this case, it is permissible various ways: drawing strokes, obtaining a dot image, and so on. The photo shows an image of a bird.
- The negative method requires more subtle and lengthy work. In this case, the design is created with the light color of untouched wood, and the background is burned out. Most often, photographs or complex pictures are burned in this way. For patterns, standard techniques are usually sufficient.

In this case, 2 methods are used. The first involves direct burning of the background around the applied sketch. The second combines carving and background: first, the entire background is burned out, and then the artist cuts out an image on it.

The relief pattern is another example of a combination of carving and pyrography. To do this, a sketch is transferred to the tree, cut out to give volume - not with a jigsaw, but with a milling cutter, and then burned out in certain areas. The photo shows a relief image.

Drawings and patterns for wood burning can be downloaded from any relevant website. You can even use your own photo if you can download the right conversion program.

Work technology
The work itself is quite simple, although it requires accuracy and perseverance. As a rule, it cannot be completed in one go.

- Use a jigsaw to cut out a part of the appropriate size, and carefully clean the surface and cuts with sandpaper.
- Patterns for wood carving are redrawn onto a sheet of paper by hand or through carbon paper.
- A pen is installed on the device required type- scribbled or oblique, and burn out the contours of the image.
- They begin to retouch the background - to do this, attach a retouching pen to the device. Other attachments can also be used. The photo shows the processing of the background under the pattern.
- After the material has cooled, the surface is cleaned of dust and soot and wiped with an eraser.
- To make the product more durable, the craft is coated with transparent varnish.
In the proposed video lesson, burning a pattern on a wooden sheet is discussed in more detail.