The cell will require a separate room where it will be concentrated. The cell manufacturing process must be taken seriously. If you do not create full-fledged conditions, then the chicks will grow and develop poorly.
Important! The house for the chicks should be convenient in terms of maintenance. To save space, you can make a cell battery for broilers. Their installation is carried out in several tiers. For breeding 150,000 individuals, it is necessary to use batteries with dimensions of 25x120 m.
Each design is equipped with manure removal elevators, a feed and water supply system. If you keep the chicks in a private compound, then the cell batteries are removed manually. So it is important to consider how to simplify the process of cleaning the manure, feeding the broilers and their drinkers.
There are certain features of cages for broilers:
- When choosing a material for the bottom of the structure, it is necessary to choose one whose thickness is at least 2.5 cm. Moisture-resistant plywood is best suited. It is characterized by increased strength, does not deform under the influence of moisture and has a long service life.
- If the walls of the cage are made of rods, then a distance must be observed between two adjacent rods that will not prevent the chicks from gaining access to food.
- Feeders require special attention. For their manufacture, it is necessary to use thin tin. It is plastic, not affected by rust and has a low weight. Just be careful not to spill the food out of the feeder.
- It is very important for birds to have fresh and pure water. Do-it-yourself drinking bowls are not suitable, so you can purchase a ready-made version. It is best to use an automatic nipple drinker.
How are they different from ordinary ones?
There is no particular difference between cages built for broilers and small chicks. The only thing to consider is the size of the structure. For small chicks, you need to equip a cage, given that no more than 25 individuals can fit per 1 m2, but 10-15 adults.
Photos and drawings of successful do-it-yourself options
See photos and drawings of cages that you can build at home from different materials, including from a bar. 


Types of structures
Today there are several varieties of cages for chickens. Among the unusual structures, cages built from a wooden barrel can be distinguished. Only the building must be clean and disinfected. No less successful are cellular batteries. They differ in size, capacity for:
- 10 individuals;
- 20 goals;
- 30 chickens.
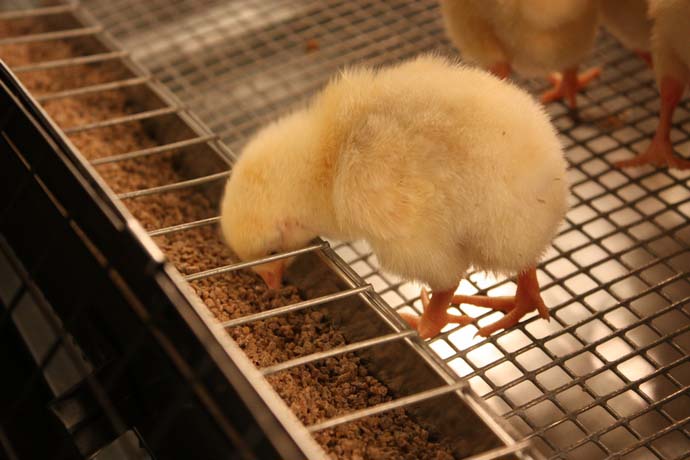
Reference! For broilers, aviary cages are a good option. There the birds are on the mesh floor. Cells can be single or multi-storey.
Necessary materials
To build a cage for broilers, you must use the following materials:

For fastening it is necessary to use self-tapping screws or screws.
Dimensions
For birds, space is very important. If it is necessary to breed 10 broilers, then 1 m2 must be allocated for them. Accordingly, for 20 individuals, 2 m2 will be required. But the chicks will grow and gain weight quickly, so you can avoid large crowding if you place 10 adult broilers on 1.5 m2.
Such designs will create optimal conditions for birds. Using a similar formula, you can calculate the cage size for a large number of chickens.
Recommendation! For more efficient operation of the structure, it is best to perform it in two tiers. This will increase the usable area and become great option for raising chickens in outbuildings.
Manufacturing process
To make a cage for broilers, you must use the following instructions:

Common mistakes
At the design stage, it is important not to make gross mistakes, due to which the entire structure of the building will have to be redone. This may include:
- Lack of protection against rodents. When drawing up a project, it is necessary that the cage be raised from the ground. Contact of a heater with soil is inadmissible. This can lead to the threat of rats. They are able to gnaw through wood and penetrate the structure. It is better to cover the lower zone between the heat insulator and the ground with broken glass.
- Use of unsuitable materials. Do not use for finishing isoplats, drywall, PVC plastic and chipboard. They accumulate moisture, as a result of which they are destroyed. In addition, toxic substances dangerous to chicks can be released. Due to high humidity, mold forms, which leads to the development of various diseases in chickens.
It is quite possible to make a cage for chickens or chickens with your own hands. To do this, you need to choose the right materials, choose the type of structure and draw up its drawing. All works are simple, so even a person who does not have the proper experience can cope with them.
Useful video
Watch a video on how to make a cage for broilers with your own hands
If you find an error, please highlight a piece of text and click Ctrl+Enter.
The process of growing a brood of quails and day old chickens, as well as broilers and turkey poults, involves the creation of comfortable conditions and high-quality heating. For these purposes, a brooder is used. It is not too difficult to draw up a diagram and make such a design with your own hands, but it is best to use ready-made drawings.
In the first days after hatching, the chicks experience increased stress, as well as increased susceptibility to disease, so the so-called "nurseries" are constructed.
As a result, an increase in mortality is observed and the uniformity of growth of young animals is reduced. To ensure optimal conditions of detention, a brooder is used, the device of which may vary slightly, but is most often represented by the following components:
- drinker;
- feeder;
- equipment for maintaining optimal temperature and humidity;
- lighting;
- ventilation;
- bedding.

It is very important that the brooder not only has a comfortable temperature, but also that the optimal planting density is observed. Only ideal starting conditions allow you to grow a healthy and large bird with high productivity.
IN Lately point brooders are increasingly being used in backyard poultry farming. In this case, the houses must be preheated. The use of this design allows the use of special brooding barriers that help control the movement of chickens. The technology requires strict adherence to the temperature regime, which will reduce the risk of overheating of the young. As chicks grow and develop, the diameter of the spot brooding area gradually increases. After a couple of weeks, the brooder can be removed from the house and the young can be transplanted into cages.
How to make a brooder for chickens (video)
How to make a brooder for raising chickens with your own hands
The type of structure and its dimensions can vary significantly depending on the type of poultry being raised, as well as its number. The floor should not be slippery and wet, and a pallet should be placed under it. A prerequisite is the presence of high-quality ventilation in the absence of drafts. The source of heating is most often a closed fluorescent lamp.
Choice of option
There are different options for brooders that allow you to minimize the percentage of waste and provide chickens with full growth and development in the first days of life. by the most budget option is a fenced part of the utility room and a lamp installed for heating.
The dimensions for 100 chickens are 200 x 100 cm with a height of 50 cm. This type of brooder, such as boxes and boxes, does not always have a positive effect on the health of the young, so special designs are most often made.

Dimensions and drawings
It is very difficult to achieve comfortable conditions in cardboard boxes and ordinary boxes. Little chickens are extremely receptive to any changes. external factors, including temperature fluctuations, changes in humidity, insufficient lighting or drafts, so building a simple structure with your own hands is very important.
Very convenient for keeping young animals is a width of 60 cm, with a length of a meter and a height of 45-50 cm. This area allows you to place sixty chickens, or a hundred quails, or forty ducklings. Depending on the scale of breeding, as well as the breed and species characteristics of the bird, different drawings can be used, as well as the most convenient sizes and designs of the brooder.
Tools and materials
Before you start making your own “house”, you will need to prepare high-quality and durable material, as well as all the tools necessary to complete the work.

Material:
- sheet plywood - two sheets measuring 1.5 x 1.5 m;
- metal corners;
- steel mesh with cells 10 x 10 mm;
- wooden slats - 50 x 15 mm;
- fasteners - galvanized self-tapping screws;
- door hinges - four pieces;
- lampholder, 60W electric lamp, plug and cable;
- feeders and ready-made drinkers.
Tool:
- wood saw or electric jigsaw;
- construction tape measure and level;
- hammer;
- drill;
- screwdriver or screwdriver;
- pliers and wire cutters;
- marker.
Depending on the design features, the number and type of tool may vary.
Drawings of a brooder for chickens (video)
Manufacturing steps
- to create a frame, you need to cut sheet plywood in half;
- one of the resulting halves is sawn in half again, which will make it possible to obtain a pair of plywood squares, 75 x 75 cm in size, to create side walls;
- the three remaining plywood pieces, measuring 150 x 75 cm, will be used to create the top and bottom of the structure, as well as the back wall;
- the frame is assembled using galvanized self-tapping screws and metal corners;
- fasteners are inserted into pre-drilled holes;
- for the manufacture of the floor, a fine-mesh mesh and a frame knocked down from wooden slats are used;
- doors are made similarly to a mesh floor and are hung in front of the frame.
The final step is to screw the rails made of rails onto the side walls and then install the mesh floor. Under the grid you need to install a metal pallet, which can be covered with paper or covered with small wood shavings.

Heating to maintain temperature
Ensuring a comfortable temperature regime inside the brooder is a prerequisite for raising chickens at home. For every square meter of area there should be 0.28 kW of heating. You can evaluate the quality of heating by observing the behavior of the chickens.
At a comfortable temperature, the bird actively eats and drinks. With excessive cooling, the bird strays into large groups. The increased temperature inside the "house" causes difficulty in breathing in chickens and is accompanied by a large waste of birds. Relative humidity plays a very important role in thermoregulation., and during first three days it should be 60-70%. During the first three days, it requires lighting for 23 hours a day.

What you need to consider when making a brooder for turkeys and quails
The standard dimensions of the structure for housing and rearing turkeys should be slightly increased, but it is allowed to use a brooder for chickens, slightly reducing the stocking density. The size of the cells of the mesh floor depends on the duration of keeping the quail:
- when grown to the age of two weeks and then transplanted, the cells of the mesh floor should be 10 x 10 mm;
- when keeping quail chicks for a month, the cell size is 25 x 15 mm.
Turkey poults can be kept in brooders with larger mesh floors. The height of the structure also needs to be increased. The period of keeping young animals in nursery cages exceeds two to three weeks, after which the bird must be transplanted into adult cages or transferred to free keeping.
Criteria for choosing a finished structure
To date, there is a fairly good selection of ready-made brooders, and their purchase allows you to solve the issue of placing chicks as much as possible. short time. When choosing, you need to pay attention to the following quality criteria:
- evaluate the size of the structure, especially if it is intended to contain fast-growing broilers or large turkeys, ducklings and goslings;
- the best option is the presence of the so-called "two-tier" floor with a non-slip surface and a retractable metal tray;
- it is advisable to give preference to brooders equipped with an automatic drinker and a high-quality feeder;
- ventilation and heating must be at the proper level, and some modern models have built-in air conditioning and heating systems.
The average capacity of standard brooders is 50-80 day old chicks. The simplest and most budgetary is a collapsible version with no automation or with a power-adjustable lamp.
A “dual-use” design is considered more convenient, the equipment of which is represented by a pair of feeders, a pair of drinkers, a plastic tray and lighting fixture with power regulator. The floor is represented by a plastic mesh with 5x5 mm cells, which helps prevent paw injuries. It is best if a special ceramic heater is used for heating, which does not irritate the bird and warms well without overdrying the air. High-quality brooders are made from environmentally friendly and veterinary-tested materials.
How to assemble a brooder for chickens (video)
Home poultry farming is simply impossible without high-quality and modern equipment, which also includes brooders. The cost of a ready-made, convenient and optimally adapted structure for growing chicks is very high, so in this case it is recommended to make a brooder on your own, with minimal time and money.
Little chickens are very tender and vulnerable birds. If you plan to keep chicks at home, take care of their safety and protection. For their maintenance, it is not difficult to build cages on your own, it is enough to make a little effort and ingenuity. So, how to make a cage for chickens with your own hands - look for photos and detailed drawings in our today's review!
Design features
A cage for small chickens should be reliable protection until they get stronger and turn into adult hens and cockerels. She must protect them from birds of prey, rodents, domestic cats or dogs, for which newborn birds are easy prey. In addition, it is desirable that the cage be mobile. It is good when it is possible to easily lift it and change the location of the chickens, choosing the most friendly places for them in the sun.
The design for feathered babies should have a source of light and heat. If you plan to take your cage outside, consider a small shed so that the chicks can hide in case of bad weather: strong sun or rain.
Much also depends on how many chickens you plan to keep at home. If a little, then a small wire construction will suit you, perhaps even without a bottom. If you want to start raising young animals seriously, then in order to save space, chicken cages are built on several floors. Also, such designs are equipped with a removable bottom tray for easy and quick cleaning.
In any case, small birds are not lodged in drafts and provide them with sufficient space. Chickens can live in cages up to the age of 45 days, then they can already be moved to a pen. Expect that in a house measuring 1 sq. m. you can accommodate up to 50 young animals.
We make a cage on our own
In order to save money, you can easily make a cage for keeping young animals at home with your own hands. But, as in any business, a responsible and thorough approach is required here, because the safety and health of daily birds will depend on what kind of housing you place them in. The first step is to decide how many chickens you want to raise.
Based on this, the dimensions of the cage and the materials that you will use for construction are determined. Make a drawing of the future structure or sketch at least a rough diagram. Next, we suggest watching a video for clarity, which shows in which houses the future chickens live.
Metal mobile structure
This cage is suitable for a small number of chickens and it is preferable to use it in the warm season. It is quite simple to make with your own hands and at home it will come in handy for a dozen chickens. It is planned that the cage will stand on the street and you will be able to move it from place to place. So, for such a closet you will need:
- galvanized wire mesh with a mesh diameter of 16x24 mm;
- aluminum wire;
- pliers or pliers.
Step-by-step instruction
- The metal mesh is cut into sections, you should have five pieces of the sizes you need. Two sides, two end pieces and one piece for the roof.
- Prepare pieces of metal wire, about 3 cm long.
- We fasten the structure with them so that its mobility is preserved.
- We fix the roof only on one side so that it can be opened and have access to the chickens.
Such a cage can be both with a bottom and without it. If you prefer the option without a bottom, then your design will easily fold into a parallelepiped and take up a minimum of space during storage or transportation. But chickens in this case will need to be transferred separately.
Simple cage with wooden walls
You can also choose a simple design with wooden or plywood walls to keep your kids. This design is quite convenient and easy to make with your own hands, but it is not so easy to transport. So, in order to make it, prepare the following materials:
- sheets of plywood or chipboard (suitable for walls);
- a grid for the floor (depending on the age of the chickens, the size of the grid cells may vary: for babies up to 15 days old, choose a grid of 10x10 mm, for keeping older birds, 15x15 mm is suitable);
- galvanized sheet;
- fixing materials (nails, screws);
- jigsaw.
Step-by-step instruction
- Based on your drawings, cut a sheet of plywood or chipboard with a jigsaw. You should get two end walls, one side and the future ceiling of the structure. It is better to make the ceiling folding, so that it is more convenient to clean the cage or add food and water.
- We would advise you to make the front side wall of wire mesh, so that it is more convenient for you to watch the chickens and they can see what is happening around. Fasten all components with nails, dowels, screws.
- From the finest mesh make the floor.
- From a sheet of galvanized metal, make a removable pallet and place it under the mesh floor.
- You can do the heating yourself. To do this, 3-4 light bulbs are installed near the back wall under the ceiling, with a power of up to 50 watts. It is desirable that they be matte, because too bright light irritates the nervous system of chickens.
Stationary battery design
- sheets of galvanized metal;
- plywood sheets;
- wooden bars;
- grid with different cell sizes;
- fastening materials.
Step-by-step instruction
- We make a frame from wooden bars, focusing on your drawings or those found on the Internet.
- We make side walls from plywood sheets.
- Using a fine mesh we make the floor of the future structure.
- From galvanized metal we make pallets for collecting litter and garbage according to the number of cells, they will be located under the mesh floor. The floor-pallet of the upper cage will simultaneously serve as the ceiling for the closet going below.
- For the cage that will be the topmost in the structure, it is better to make a wooden roof.
- Choose which of the side walls you will have open and make it from a grid with wide cells. Near such a wall, it is good to attach feeders with brackets.
- All elements are fastened with screws, dowels or nails. It is better to start the assembly from the bottom cage and already to it, as if to “attach” the subsequent floors.
- To make this design mobile, you can attach wheels to it.
Whatever house for chickens you end up building with your own hands, do not forget to equip it with feeders and drinkers, you can also make them yourself. Nipple or vacuum drinkers are suitable for small chickens. You need to wash the feeders and drinkers every day, because the chicks that are raised without chicken are more vulnerable and demanding of themselves!
Photo gallery
Video "Cell battery for rearing young animals"
In the video below, an experienced farmer shares his experience of cage keeping chickens, you can also see how the structure is equipped inside.
Growing broilers is a responsible and time-consuming process. In order to carry out natural and competent breeding, you need the right cells and of course nutrition.
In the spring and summer period, 4-5 batches (each numbering 30 individuals) of high-quality broilers can be grown in home garden conditions.
The productive period of one batch lasts 40-45 days, and slaughter occurs selectively when the bird reaches 50 days of age. Hens grow more slowly than roosters, so the male chicks are slaughtered first.
Large structure and fast growth are the main features of broilers. At 50 days of age, meat breeds of chickens reach 1.5-2 kilograms, while an ordinary chicken weighs about 800 grams.
Therefore, breeding such breeds is an economical and profitable business.
Broiler hybrids are very whimsical to the conditions of detention, they prefer bright, warm and well-ventilated rooms.
The two most commonly used types of broiler breeding are:
- outdoor,
- Cellular.
Both methods have their advantages and disadvantages. For example, outdoor cultivation does not require the construction of any complex structures, but the cleaning procedure is greatly complicated, and the presence of a large amount of litter in the litter adversely affects the health of chickens.
Cells allow you to effectively use the usable area (due to the ability to install one above the other), facilitate the cleaning procedure, but require capital expenditures for the creation or purchase of finished structures.
Whatever the reasons for choosing to grow broilers in cages, below we will consider the procedure for assembling these structures with our own hands.
Get creative in production broiler cages. Blueprints you can make it yourself or ask about the dimensions of standard cell batteries.
Cages should be modern, easy to use and maintain, automated for food and water supply.
Broiler cage size usually depends on the number of heads grown. The most popular types of structures today are cages for ten, twenty and thirty heads. For one square meter, you need to count on the accommodation of 4 broiler chickens.
The generated cells should be divided into two types:
- For small chickens (so-called brooders);
- For youngsters and adults special.
In both the first and second cases, there are no strict standards governing the dimensions of structures for poultry living. There are norms based on the number of individuals per square meter, and indeed, this is the most universal approach.
For small chicks (meaning chicks between 0 and 15 days of age from hatching), it is recommended not to exceed 25 chicks per square metre. And with young and adult chickens - about 10-12 pieces per 1 square meter.
First of all, these indicators should be taken into account when planning future cells.

If with chicks even ordinary carton boxes from under household appliances, then for a grown bird, experienced farmers recommend the following cage dimensions:
- Width (depth) - 70-100 cm (greater width is not recommended due to the difficulties of cleaning the litter from under the battery of cells, a smaller one is possible - up to 30 cm);
- The length depends only on the bearing capacity of the frame materials and the possibilities of placing a chicken coop, for example, 70-140 cm;
- The recommended height is 25-35 cm (height with a niche for a tray with litter - 45-55 cm).
Accordingly, the cage area with a base size of 70 * 140 cm is enough for a comfortable stay of 12-15 broilers.

Making a cage for broilers - step by step instructions
Below we consider two types of construction: for chickens and adult broilers.
Chick quarters 0-15 days old (brooders)
To create boxes in which chickens will live, you can use, as mentioned earlier, ready-made packages from household appliances. You can assemble a box from sheet cardboard, or you can use a more durable construction made of plywood and timber.
Let's dwell on the least expensive option in terms of finances and time - cardboard brooders.
It is best to use two separate boxes connected to each other with a slotted passage.
In one, the chickens will sleep, in the other, you can install a drinking bowl and a feeder. In both rooms it is necessary to organize air heating up to 26-33°C. This can be done using an ordinary incandescent lamp (suitable, for example, a table lamp).
In a room with a drinker, the light can be turned off at night. To automatically maintain the desired temperature balance in the brooder, you can use a thermostat, it will turn the lamp on and off in a certain temperature range.
The bedding on the floor should be made from a piece of cloth or a layer of fine sawdust (warm hygroscopic material).
Access to the drinker should prevent the chicks from getting wet (this can be a ready-made drinker with a dispenser or a home-made design that works on a similar principle).
Cages for broilers 15-40 days
The following stages of construction of cages for broilers can be distinguished:
- Choice of materials;
- Drawing up a drawing;
- Preparation of materials (purchase, markup, etc.);
- Frame assembly works;
- Sheathing (mesh and sheet materials);
- Installation of drinkers and fittings (doors, locks, heaters, feeders, etc.);
For the work you will need tools and materials.
The most affordable and easy to use are galvanized mesh with a cell of no more than 70 * 70 mm, wood (finished planed or unprocessed beams and boards), plywood sheets (as an option - OSB boards or other similar materials), galvanized steel sheets (for pallets and feeders), as well as fasteners (nails, staples, screws, etc.).
Of the tools that can come in handy: a hammer, pliers (or pliers and wire cutters separately), a hand saw for wood (or an electric jigsaw as an alternative), a tape measure, a square, a screwdriver (screwdriver), metal scissors, etc.
The load on the cage floor should be calculated based on the weight of one adult chicken in 2.5 kg. That is, a cell with an area of 1 square. m for 15 birds must withstand 15 * 2.5 = 37.5 kg. It is best to make a design with a margin of safety.
The smaller the planned load, the smaller the thickness of the beam can be used. With a large span, it is best to additionally strengthen the floor with another crossbar in the center.
If there are several tiers, support poles can be made of metal.
As an example, consider a structure of three tiers with an area of 70 * 100 cm.
With a section height of 50 cm (cage - 30 cm, a niche for a pallet - 20 cm), you will need 4 standing from a bar 50 * 50 mm 150 cm long.
- We take two racks. We lay them out at a distance of 70 cm parallel to each other.
- Stepping back 5 cm from the top on each, horizontal jumpers 70 cm long are screwed in increments of 30 and 20 cm alternately (5 cm indent, timber, indent 25 cm from the bottom of the jumper to the beginning of the next one, timber, 15 cm indent, etc.). Thus, we get two blanks for the side walls with support bridges.
- Now long beams (100 cm) are laid on top of the lintels, for greater bearing capacity, not two, but three beams can be laid (two at the edges and one in the center). The frame is ready. If necessary, the connections can be strengthened with overhead metal corners.
- A sheet of plywood or metal is mounted on the upper horizontal beams (depending on where the cage will be used). Then - a fine mesh (the floor of the upper cage), the next plane - galvanized metal for litter, etc.
- After mounting the horizontal surfaces, you can proceed to the wall cladding. The side and rear walls can be sheathed with both opaque materials (metal, plywood, OSB, etc.) and mesh.
- The front part of the cages is equipped only with a grid, into which doors and feeders with drinkers will later crash.
- According to the required format in the grid with wire cutters, pliers or other tools, squares are cut out under the doors. The latter may have an additional frame made of a profile, timber, etc. or not have it. Then the swivel loops can be replaced with ordinary wire. The reliability of this design is no worse than classic doors, only ease of use suffers.
The feeder is assembled from a sheet of thin stainless steel and hung on the net at the bottom of the cage, so that the chickens can easily stick their heads through the net and eat.
If the mesh has a fine mesh, it is necessary to organize vertical cutouts above the feeder with a width of approximately 70 mm and a height of approximately 140 mm.
A drinking cup is best organized with a dispenser. The water tank can be installed in any convenient place: on top of the battery with cells, on the sides, on the back or front wall.
For the convenience of cleaning, metal pallets for litter can be made movable and with a slope. With a large area of \u200b\u200bcells, pallets are best broken into smaller ones.
RELATED VIDEO
Raising chickens is very different from raising broilers. Based on this, the cells for their residence will also differ. Chickens need a comfortable floor, spaciousness, blackout.
Broilers, on the contrary, need a minimum space, a bright room. If these main factors are not observed, you can lose a lot of time waiting for the broiler to grow and suffer a loss in feed.

- Only a warm and dry place. Temperature regime supported by any device that emits heat.
- At the initial stages, you can use heating pads or electric lamps, which must be installed at the top of the cage.
- In the summer, when the broilers are 30 days old, the cage can be taken out to fresh air provided the weather is warm.

The temperature of the broilers in the cage should reach:
- 34 °C for day old chicks;
- 30 °C for chicks six to ten days old;
- 22 °C for broilers in the age group of 50 days.
- Proper lighting. For the first 3 weeks, chicks need around the clock lighting. After that, you can reduce the light supply every day. When the indicator reaches 16 hours a day, it is forbidden to reduce it until the slaughter. Lamp power must also be taken into account. The first ten days, the indicator should not exceed 4W per square meter. For the next twenty days, 2W of illumination is recommended, followed by 1W.
- Proper placement of feeders and drinkers. Feeders should be placed on one side of the cell battery, and drinkers on the other. Use brackets and screws to fasten them. To prevent the drinkers from leaking, you can lay rubber linings in them.
After you figured out where to put the cages for broiler chickens, familiarized yourself with the basic rules for growing birds, you can start making cages.