Many poultry farmers pay attention to indoutok, also known as musky ducks. These birds are unpretentious, but a person must take care of creating comfortable conditions for keeping. To get offspring, you need to create nests for indoutok. They must meet the established requirements, be comfortable.
Poultry farmers need to know how to make the bird nesting place as comfortable as possible. This question should be puzzled in February. It is during this period that birds begin to show sexual activity. This is soon followed by the start of oviposition.

Primary requirements:

Poultry farmers should ensure that there is no competition between Indo-ducks and other birds for a nesting place. It is important to provide a calm and quiet environment. This is the key to successful incubation of offspring. If possible, the hens are separated.

Muscovy ducks themselves can find a suitable place for hatching eggs. But sometimes it is outside the yard. Therefore, poultry farmers are interested in equipping their own "home" for the appearance of offspring.
Please note that if other chicks enter the room where the mother duck sits, then it is likely that she will leave her eggs and start caring for the ducklings. This will lead to the death of the abandoned offspring. Therefore, access should be limited as much as possible.

These birds love a calm environment. When placing several places for incubation in one room, it is recommended to place the houses at a distance from each other.
Nesting site preparation period
Taking into account the fact that the instinct of reproduction in Muscovy ducks works at the end of February, it is necessary to ensure the presence of a drake. He will be able to impregnate all indo-woks. The egg-laying process begins in April: before that, they should already find a place for themselves.

Experienced poultry farmers know how the behavior of birds changes during this period. They begin to actively look for a house. If there is nothing suitable, then the bird chooses any empty box, a small barrel, a street table box or a basket as a nesting house. If you transfer the selected item to the poultry house, the place will be ready.

Often, when the nesting instinct appears, birds begin to dig holes. In such situations, poultry farmers are advised to prepare houses for hens on their own. This should be done in autumn or winter, so the birds will have time to get used to new homes. But even if they are made at the end of February, during March the Indochka will have time to get comfortable and choose a suitable home for hatching offspring.

Making homemade nests
Indout nesting sites can be made from any material. Poultry farmers use:

But it is not necessary to make special dwellings; it is more convenient to use improvised items that birds have chosen. They must be placed away from aisles and intense light sources.
It is desirable to make places for sitting out taking into account the parameters of the indoutok. It is not recommended to use places inhabited by chickens. Nest design features slightly different, they are summarized in the table.
There should be no difficulty in entering the duck's nest. Bird breeders advise each Muscovy duck to make a separate nest and put them in different places. If this is not possible, then dense partitions are installed between the hatching places.

You can equip a shelter for a laying hen from any materials available in the yard:

The owners can combine the materials used in any way convenient for them. With a shortage of boards, the lower part of the nest is made from them, and chipboard, fiberboard, plywood are used to make the sidewalls and the roof. It is advisable to lay dense polyethylene, linoleum on the floor of the nest to avoid damage to the tree from bird droppings.

For the bottom of the nest, materials with good thermal insulation properties are taken, which are characterized by water resistance and a moderate degree of rigidity. It is advisable to place the nest on a hill about 10 cm from the floor. It is necessary to raise houses for hatching and separately insulate them if the house has a concrete floor.

Dimensions may vary depending on the parameters of the indouts themselves. But the entrance must be made in such a way that the feathered animal can easily enter and exit its familiar place. The owner should be able to easily and quickly change the bedding if necessary.

Having built a nest, it should be equipped. It is advisable to put a waterproofing material on the bottom and make a litter. A laid egg may try to be buried in a litter, so it is not recommended to make a floor that is too hard (for example, made of metal).
moisture resistant plywood prices
Plywood moisture resistant
Accommodation rules and requirements for the premises
It is necessary to put nests in poultry houses in the most secluded and shaded areas. But these are not the only rules of placement. Near the nest, there is a feeder, a container with water for bathing and a drinking bowl nearby. The Indian should be able to swim, drink and eat without going far from the eggs. The optimal distance is about half a meter.

Putting all the nests in one part of the house is not recommended. When installing, you must be guided by the following rules:
- the distance to the feeder and drinker should be small, this avoids turmoil among the birds;
- the nests are turned sideways or with the back towards the entrance: the indo-women should not see that the owner or other birds are entering the house.
Humidity in the room where the indos will be located should be maintained at 60-70%. These waterfowl do not like excessive dampness. In winter, it is advisable to heat the house a little. And on hot days, lightly spray the floor and walls with water.

Indian women were brought to our country from South America Therefore, they do not tolerate severe frosts well. They need a warm environment. When choosing a poultry house Special attention given to the floor. best material wood is considered for its manufacture. But it can quickly deteriorate from moisture and duck droppings. Therefore, you can cover it with old linoleum.

Some equip greenhouses for keeping birds. A bedding is poured on the ground for insulation. Nests, drinkers, feeders, a bathing container are placed in the greenhouse. It is necessary, because it contributes to the fact that the eggs are washed and saturated with oxygen in a natural way.

If the room has a concrete floor, then the owners should take care of the litter. It will protect the paws of animals from hypothermia. Separately, you should think about the insulation of the walls. This can be done with foam or glass wool. But with internal insulation, do not forget to sheathe the walls of the house with chipboard or clapboard.

Feeders and drinkers for birds should be marked in the house. They are made along the walls. Their location outside the walls of the room is allowed - along the walking area. Taking into account the love of indows for water, many recommend installing nipple drinkers. This will be the key to keeping the water clean.

If you put an ordinary basin, then in an hour the water in it will look like a swamp.
Self-building nests
To create a nesting dwelling with your own hands, you need to prepare:
- slats, bars, any wood, plywood, chipboard, trimmed OSB boards;
- hammer, saw;
- screws, nails.
Having decided on the size, it is necessary to cut the slats and bars of a given length. The boards are fastened together so that the shape of an open box is obtained. The bars are used as supports. At the bottom, it is desirable to equip a small threshold: it will protect the eggs and bedding from falling out of the equipped house.
Many make long houses for 2-5 ducks at a time. Such an arrangement of females is permissible if dense partitions are made between the nests. If some Indian woman sits down to incubate offspring earlier, then the chicks will appear in her first. Other birds may drop their eggs and take care of the newly hatched ducklings. For this reason, if possible, it is better to make separate houses and place them in different parts of the house. Most the best option seating of indoutok in different rooms is considered.

When forming a manhole, one should be guided by the dimensions of the bird, it should freely enter the equipped "dwelling". On top of the entrance, you can fill the bar, which will darken the nest a little. The roof can be made from a sheet of OSB-plate, chipboard or slate. When covering, keep safety in mind, the risk of roof displacement must be minimized.

It is not necessary to make a nest for every duck: not everyone will be hens. You should be guided by standardized norms: on average, 1 out of 3 ducks sit down to incubate eggs.

You can see how and from what people make nests in personal subsidiary plots in the video. Some adapt old furniture for feathered houses.
Prices for OSB (Oriented Strand Board)
OSB (Oriented Strand Board)
Vide - Nests for indoutok
Hatching features
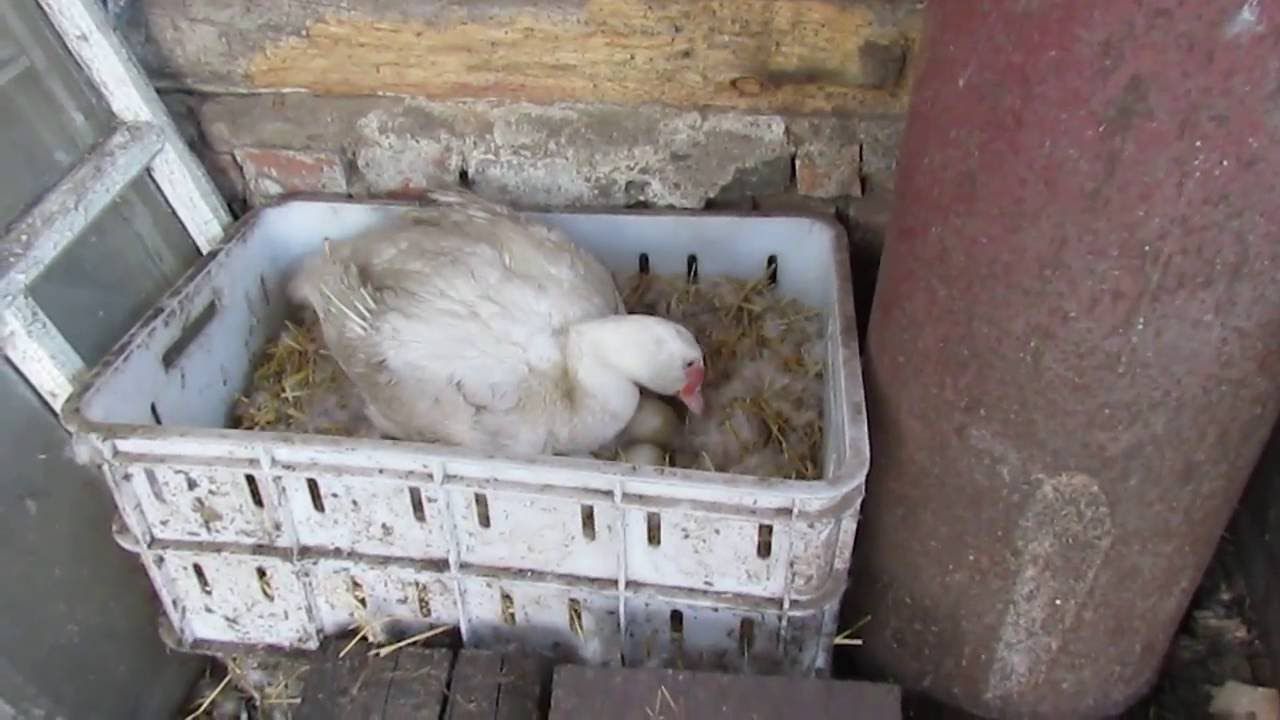
Muscovy ducks choose the most suitable places yourself on your own. Noticing that some Indian has chosen an unnecessary barrel or an old dog kennel, you should equip it with a nest.
If the process of laying eggs has begun, then you should not disturb the bird. Poultry breeders of indoutas say that it is undesirable to remove eggs from the nest. So you can disrupt the process planned by nature. The duck buries the laid eggs in the bedding and insulates them with fluff, which she plucks from herself.

The female sits on the eggs, usually at a time when there are 12-16 eggs in the clutch. For this reason, in the region of 12-16 days, the owners are recommended to lay more eggs in the indochka, but there should not be more than 23 in the clutch. A small individual can only heat about 12 eggs. The hatching process lasts about 29-32 days.

Nest Inspection Procedure
It is the responsibility of the owners to provide indoutok with food and water during the incubation period. They should also periodically inspect the house of a feathered female. In the first 1-2 weeks, you should not touch the eggs and the litter. But after that it is necessary to inspect the nest, remove heavily polluted, cracked eggs and eggs of irregular shape, with deformations.

You should look in and put things in order only when the duck goes for a walk. Otherwise, the female may leave the unbroken offspring. But it is recommended to do it daily. The female usually walks for an hour every day, so the owners have time to inspect. Although some hens leave their homes only for a few minutes to eat and drink.

It is advisable to mark all the eggs that are under the bird. This is necessary in order to avoid the possibility of other ducks throwing eggs. If you find at least one without a mark, you can safely pick it up.
How to train a duck to rush in the nest
Indians can choose any suitable place, in their opinion, in order to lay eggs. Therefore, some ducks should be purposefully taught to rush only in the nest.

A false egg will help you choose a place for oviposition. It is laid in the nest chosen by the owner, the duck can be demolished there one more. You can increase addiction if you constantly leave 1-2 laid eggs in a well-equipped place. So that they do not deteriorate, they can be marked with a simple pencil. The marked eggs are taken after 1-2 days, fresh ones are left in their place.

It is difficult to force an Indian to incubate offspring. If we are talking about a young female, it is almost impossible to correct the situation. Ducks 2-3 years of age may refuse to sit down due to unsuitable conditions, bright lighting of the house, and the presence of noise.


Usually indoutok is called a walking incubator. When about 20 eggs are collected in the nest, she herself sits down to incubate them. The female completely equips the nest in just 2 days, insulates future chicks with her fluff.
Possible problems
Novice poultry farmers should be aware of the difficulties they may encounter when equipping nests and hatching chicks and prepare in advance.
Most often, owners are faced with the reluctance of ducks to rush in an equipped place. This problem is solved by laying a false egg or moving the chosen container for laying eggs into the house.
There are situations in which two ducks sit in 1 nest. There are several options for solving this problem:

- organization of another house for one of the indoouts in a different equipped room;
- imperceptible division of eggs into 2 nests (provided that there are too many of them for one musky duck);
- some poultry farmers let the situation take its course, hoping that the Indians will distribute responsibilities and roles on their own.
Rarely, situations arise when Muscovy ducks will mix up their nest. This situation is possible if there are several houses nearby. In this case, the owner himself can transplant the indo to the right place.
Video - What to do if the indochka mixed up the nest
Ejection of eggs by the female from the nest. This happens for several reasons:
- natural selection, which is carried out by the mother hen, rejecting unsuitable eggs;
- moving the nest (it is strictly forbidden to move the equipped house of the indochka);
- human intervention in the process of incubation and hatching of offspring.
The departure of the female from the nest. It is almost impossible to return the hen back. If the indo-duck decided to take on the responsibility of caring for the hatched ducklings she saw, left due to unsuitable conditions, then poultry farmers should take the eggs into the incubator or try to quietly put them on other hens.

Prices for egg incubators
egg incubators
Most breeding problems can be solved. But only experienced owners can do this. Novice poultry farmers are often confused and do not know how to train a bird to a nest or encourage it to start hatching ducklings.
Muscovy ducks (or, as they are called in another way, indo-ducks) were brought to the territory of our country in the 80s of the last century.
Thanks to its original appearance, unpretentiousness and unusually tasty dietary meat, this breed of ducks quickly gained popularity.
For successful breeding Muscovy duck is enough to organize a place for walking in the house and equip nests for laying eggs.


Duck nests can be roughly divided into three main types:
- Open nest boxes. The simplest type of nest, which is an ordinary wooden or plastic box with straw bedding;
- Semi-closed nests with high walls without a top;
- Closed nest-booths with walls and a roof.
Closed nests are ideal for broody ducks, as having a roof gives them a sense of security and privacy.
Requirements for the design and dimensions of the nest for laying eggs of the Muscovy duck
It is important to organize comfortable places for bird nesting. If the indooute is not provided the necessary conditions on the territory of the poultry house, then she can find a nest outside of it, which will add problems to the novice poultry farmer.
What should be mother duck nest?
It must meet the following requirements:
- As for the size of the nest, its optimal length is 40-50 centimeters, width - 30-40 centimeters, height - 25-35 cm. The entrance should be such that the duck can freely exit and return to the perch.
- Nests should be located in dry and shady places, away from passages;
- Dry straw bedding should be soft and deep enough (the downy feather bed for eggs will be lined by the duck on its own);
- The absence of temperature fluctuations, dampness and drafts, the presence of ventilation in the house are fundamental conditions.
It is advisable to make separate nests for each laying duck, however, in order to save
places in the poultry house often make several nests at once in a common building.
A prerequisite is the presence of blind partitions between the "rooms" so that the birds do not distract each other during the responsible hatching process. You definitely need a low threshold at the entrance - it will not allow the eggs to roll out of the nest.
Instructions - building nests for domestic ducks
Nests for musky ducks can be built from any material at hand. These can be old baskets, boxes, all kinds of containers, etc.
However, if there are a lot of ducks, it is much more convenient to build full-fledged houses for them so that all birds feel equally comfortable. The best material for this will be wood, plywood or osb-plate.
To do Muscovy duck nest classic closed type, you will need the following materials and tools:
- wooden beam with a section of 30x30 for the frame;
- osb sheet, plywood or wooden slats; hacksaw;
- old linoleum or thick plastic wrap;
- wood screws 50-60 mm, ruler or tape measure;
- pencil;
- straw for bedding.
Work progress:
- a frame measuring 50x40x35 centimeters (length, width, height) is assembled from a bar;
- they cut out of plywood: two rectangular parts measuring 50x40 cm (floor and roof), two parts measuring 50x35 centimeters (side walls), one piece measuring 40x35 centimeters (rear wall), one piece 40x7 cm (sills);
- using self-tapping screws and a screwdriver, we alternately fasten the ceiling, floor, side walls, back wall and threshold from the entrance side to the frame;
- since wood quickly rots from the aggressive effects of bird waste, if possible, it is recommended to lay an additional waterproofing layer of film or old linoleum between the base of the floor and the straw.
Breeding indoutok is a fascinating business, and her meat is tasty, nutritious, there is little fat in it. They have not lost their incubation instinct, they are wonderful mothers, so the process does not cause much trouble. You just need to make sure that the ducks can safely incubate their eggs in the allotted places, and do not arrange laying away from home. There it is impossible to control the process and protect the hatched chicks from birds and cats, and for this it is necessary to properly equip their nest. How to make it with your own hands so that the bird likes it, and she safely breeds?
Indo-ducks and common ducks require the construction of nests for laying eggs
Nest requirements
There are no special requirements for nests of waterfowl, they must meet the usual criteria, the same for all birds rushing at home:
- the location of the nest must be dry;
- a thick layer of litter is needed so that fragile eggs are not damaged;
- it is good if the nest is located away from the passage;
- the number of nests must be calculated so that they are enough for each laying hen.
Peace, silence, subdued light and solitude are especially important for musky ducks, therefore, during the period of laying and incubation, these conditions must be provided for them.
But offspring can not wait at all, since the eggs can be damaged, and on the way to the house of defenseless chicks, many dangers await. Yes, and the mother hen herself will have a hard time, she is not able to resist or run away from a predator at the time of incubation.
Therefore, building a nest is a responsible issue, it must be approached with all seriousness.

If the duck does not like the proposed nest, she will make it herself in a secluded corner
Duck room
Do not forget that the productivity of a bird depends on the care and maintenance, therefore, requirements are also imposed on the room where the nests will be located:
- The shed where the ducks are placed should be warm, made of environmentally friendly material.
- It is desirable that the birds be kept in it separately from other birds, since serious battles often flare up between males of other poultry, and peace and solitude are necessary for hens.
- In the nesting area, it is required to keep clean, regularly change the litter, ventilate and disinfect. The number of hatched eggs is affected by light, windows are needed to provide it.
- Dampness in the barn for ducks is detrimental, the limit of permissible humidity in the room is 70%.
- Earthen floors are undesirable for ducks, since in spring and autumn, from excessive moisture on the street, it will become damp, and this will contribute to the spread of dirt.
- A bird with a wet belly and paws will stain the eggs, this will certainly affect their hatchability, and its health too.
- It is better to make the floor wooden, with a slight rise from the ground level, then it will always be dry, and even if the ducks get carried away, splashing at the drinker, the moisture will not spread throughout the barn.
- All cracks and holes in the floor must be sealed in order to minimize access to rodents.
- On hot days, provide access to fresh air.
- A feeder, a drinking bowl, perches - everything necessary to ensure the normal functioning of ducks should be freely available.

Perch for ducks made of plywood
Nest making
What does a typical domestic duck nest look like? The ideal option is when it has a roof, which gives the impression of security and privacy. A threshold from below is required, it will not allow the masonry to roll out and the litter to fall out.
For musky ducks, it is preferable to choose a tree as a material for building a nest with your own hands. It can be simple plywood, slab, tes or another type of wood. A diagram of an acceptable design is shown below.
What material is required:
- plywood;
- wooden slats 6 pcs. 40 cm long and 2 pcs. 50 cm;
- nails or screws
- saw;
- ruler;
- pencil.

Duck nest drawing
Progress:
- cut out of plywood: 2 square parts, their dimensions are 40x40 cm;
- in one of them, at a height of 9 cm, a hole is made on the side or in the middle, its size is 17x17 cm, this will be a hole;
- further, it is required to make 2 more parts, the length of the side walls is 50 cm, the height is 40 cm;
- ceiling 1 pc. size 40x50 cm;
- then, the frame of the structure is made from the rails;
- all parts are fixed on the rack frame, the base nest is ready.
The bottom can not be nailed, but you should not use iron as a floor when building a house for ducks. Since the material is quite hard, and ducks, trying to hide their eggs, bury them in the litter, and this is fraught with cracking of the shell.
The finished house is placed directly on the plank floor, and a deep bedding is laid down. So that the eggs do not get dirty and pathogens do not collect on them, it needs to be updated periodically. Indochki usually rush in the early morning, so the change of straw is done in the evening, so the cleanliness of the shell is ensured.
You can make a nest and an ordinary box measuring 400x500x20. For these purposes, any other suitable object is suitable: a small barrel, a dog kennel. The main condition is that the bird likes this house.

Duck perches are conveniently made of wood
Place for a nest
The correct location of the nest is important: on the one hand, the bird should be in silence and solitude, on the other hand, it is important to provide the owner with free access to inspect the nest, clean it, change the litter, and collect eggs.
It is best if the houses for each laying hen are located in different parts of the house.
When this is not feasible, and simple boxes are used as nests, they should be separated from each other by partitions so that future mothers do not conflict. It is better to place them on a small elevation from the floor, 20 cm is enough.
It is good when the bird cannot follow the movement of the owner and other inhabitants of the barn from the nest, so the houses are placed sideways or with their backs to the aisle. And while she is incubating the eggs, it is preferable to visit the barn as little as possible.
It is not recommended to place boxes near cold and damp walls.
The bird itself often helps to choose a place; it sits for a long time in the part of the shed that it likes.

To choose a place for a nest, you need to notice where the Indochka likes to sit.
How to teach a duck to rush in the nest?
Sometimes ducks, especially young ones or those who have moved to a new place of residence, do not always understand where they are to rush, and lay their eggs directly on the floor or ground. Then they need to be accustomed to new nests:
- At home, it is better to place them in the poultry house since the fall, then the bird will have time to get used to them, choose a corner you like.
- You can put an egg made of gypsum or chalk in the boxes, when she sees it, she will immediately figure out where to rush.
- Sometimes, in order to teach the stubborn to rush in the right place, they close it in the barn for a while.
- When collecting eggs for storage, it is impossible for the ducks to see how the owner takes them, they are able to leave the nest and start hiding, then it will be more difficult to teach them again.
When the owner sees that the duck not only covers the eggs with hay, but also plucks the fluff, covers the nest with it, this means that it is preparing for incubation.
Having made a nest with your own hands, properly positioning it in the house, providing proper care and nutrition, you can be sure that wonderful healthy ducklings will hatch in due time.
If on personal plot there is a place where you can place a small barn and a walking area, then it is quite possible to start breeding birds. Today, many decide to try their hand at poultry farming in order to raise ducks. different breeds. These domestic tiles are unpretentious in care and quite hardy to high and low temperatures, so their breeding is not only not very difficult, but also quite profitable.
In order for the process of growth and reproduction of ducks to be successful, you will not have to make excessively large expenses, but it will be necessary to take care of creating comfortable living conditions for the birds. For those owners who decide to start raising poultry in the local area, the question will inevitably arise of how to build a poultry house for ducks with their own hands without incurring significant costs. We will try to answer it in this article.
Duck room size
Before buying ducklings, it is necessary to determine what size the room will have for them. To do this, first of all, it is necessary to measure the area that can be allocated for this building.
If chickens already live on the site, and for them, then it is quite possible to temporarily or even permanently add five to seven ducks to them - as a rule, they will get along well with each other. If the plans of the owners are to acquire more ducklings, it is better for them to build a separate house, and, depending on its area, the number of birds that can be placed in it is calculated.
So, one square meter of the room should be designed for no more than three adult ducks. These birds love space, so if a separate building is being built for them, then you should not make it less than 16 m², even if only 10 ÷ 12 ducks are purchased. It must always be remembered that a large crowding of birds in one room (pen) causes excessive competition, so the birds get stressed and experience serious discomfort, which is why they gain weight poorly or even lose it already gained.
What else is important to know about poultry houses for keeping ducks
In addition to the size of the room, when building such a house, you must always take into account how the ducks are kept, and what needs to be provided for their comfortable living and rapid growth.
 Ducks, unlike chickens, are kept "in one tier" - only on the floor
 If in the chicken coop it is necessary to fix the poles for perches, it is allowed to build nests on several floors, then the ducks are kept on the floor, which is covered with dry bedding.

In order for the house or shed for keeping this bird to remain dry, it should not be installed in the lowlands of the site, where morning fog stands for a long time and abundant dew accumulates. The best option would be a hill on the south side of the territory.
Ducks are waterfowl and they are very fond of clean water, but they may well get sick from stagnant swamp fluid. Therefore, water must not be allowed to stagnate under the poultry house or in the yard.
If there is no elevation on the site, you can raise the bird house 300 ÷ 500 mm above the ground by installing it on a columnar foundation - then a comfortable habitat will be created in the poultry house for any time of the year. For the convenience of getting the bird inside, a bridge with horizontal bars attached to it is attached to the entrance to such a raised barn. But it should not have too steep a slope, as it will be difficult for ducks to climb it.
Varieties of poultry houses for keeping ducks
Temporary duck pen
If there is still no suitable utility room on the site, and the ducklings have already been bought, then at the time of the construction of the house, you can fence off a place for them with a portable partition. This will require a bar with a thickness of at least 50 mm and a metal chain-link mesh with cells of 20 × 20 mm.

Such a corral should be a wooden frame, completely sheathed with a net, open only from the underside. A temporary poultry house will also be in demand after the capital “house” is built, as it can be used as a platform for walking ducklings or a small number of adults. Due to the mobility of the corral, after the ducklings have trampled and pecked out all the grass in the territory closed with a net, it can be completely rearranged to another place in the area where there is still plenty of grass.
Such a device will not allow the bird to scatter and protect it from birds of prey, as well as from the penetration of dogs or cats. Ducklings will be in complete safety, but at the same time - in the fresh air and in the sun, which is very useful for their immunity, growth and development.
In order for the ducklings to be completely comfortable, it is imperative to put a basin of water and a feeder filled with food in the corral.
Stationary poultry house for keeping ducks
To build a stationary duck shed, you can use various material is wood, brick, aerated concrete blocks or polycarbonate.
Wooden poultry house
Wood is an excellent material for building a poultry house, as it is warm, breathable and environmentally friendly. Various types of lumber can be used for construction - from logs to boards.

So, for a frame shed, a crate is created from a bar of different sizes in cross section. For example, a more powerful beam measuring 120 × 120 mm is used for the upper and lower strapping, and 70 × 70 mm will be enough for walls and partitions. Sheathing of the frame is made of board or plywood.
Another option for using wood is an outbuilding made entirely of timber. However, such a poultry house will be very expensive.

A third way to use wood to build a duck house is a log cabin. But no matter what type of wood is chosen, the walls will still require good insulation.
Frame poultry house - fast and affordable!
For commercial buildings, the most often chosen option is frame construction. For example, the construction process is described in stages in the article "", which is posted on the pages of our portal.
Building for ducks made of brick or aerated concrete
A poultry house made of aerated concrete or brick will cost more than an outbuilding built from other materials. In addition to the high cost, brick construction is a rather complicated process that requires certain experience in this work, and if there is no practice in performing brickwork, then you will have to invite a specialist.

The advantages of building a barn from this brick or blocks include durability and strength, and the main disadvantages are that the building turns out to be quite cold and will require enhanced insulation. A poultry house made of aerated concrete or stone will be difficult to warm up, since heat is poorly retained inside such outbuildings.
poultry netting
Polycarbonate poultry house
In regions with a mild winter climate, poultry houses for ducks began to be built from polycarbonate, in some semblance of greenhouses. Polycarbonate material retains heat well inside the room, since drafts are not created in it due to practically hermetic walls.

The transparency of the panels will ensure that there will always be enough daylight in the greenhouse, and due to the fact that cellular multilayer polycarbonate retains heat well, it will be quite possible to heat the building from it with one of the existing simple types of heating.
The main elements of a poultry shed for ducks
Foundation for poultry house
The construction of the foundation for the poultry house will depend on what material its walls are built from, since it is their weight load that directly affects the deepening of the base.
- For wooden building
For example, a wooden frame building is light in weight, therefore, when building a poultry house in this way, it is quite possible to do without a foundation at all - to raise the building on racks resting on a flat area.

If the frame house is planned to be raised above the ground on such racks, several problematic points can be solved at once:
- The room for ducks will not become damp from the soil, and inside it will be dry and warm;
- It will be more difficult for rodents and other predators to get into the duck house;
“Under the shed, there is enough space that the ducks will definitely choose on hot summer days, as coolness and shade will always remain there.
Racks can be metal pipes deepened into the ground by 350 ÷ 400 mm and reinforced with cement mortar (a kind of mini-piles), or metal racks are welded to a frame made of the same pipes with a diameter of 100-150 mm.
If the building rises above the ground, then under the entire poultry house it is recommended to backfill with fine-grained expanded clay, which rodents do not tolerate. For backfilling, you need to prepare a recess by removing the top layer of soil by 100 ÷ 120 mm, and then the resulting space is covered with expanded clay to the full depth.

If desired, the frame can be raised to a columnar foundation, which does not need to be deepened much, since the structure placed on it will not give a large load.

If you plan to have only a few birds, then it will be enough to install a small house that does not require a foundation at all. If it will be installed on the ground, then it is possible to prepare this zone by falling asleep on it and ramming rubble, and then laying a sand cushion on which a sheet of flat slate is laid. It will become a reliable and even basis for a small poultry house.
A log house or block structure must have a foundation, as it has a greater weight. It can be used as a columnar or pile, as well as a tape base.
How to build a columnar foundation?
A wooden poultry house does not require a strong foundation, but its reliability should not cause concern. How to do it right - read in a separate publication of our portal
- For the house of their bricks or blocks
Under the construction of brick or other heavy building material, the foundation will have to be done, significantly deepening it into the ground. The best option for stone buildings will be the tape type of the base.

If it is planned to equip the floor of the poultry house for ducks with a concrete screed, then it can be done immediately after the foundation tape hardens and gains strength. The deepening of the foundation into the ground will depend on the thickness of the walls, but it should not be less than 400 ÷ 450 mm.
Roof
The roof of the poultry house for ducks can have any of the existing structures, but the most common, due to ease of installation, are single-pitched or double-pitched truss systems. Any roofing material that is affordable can also be used to cover them. Most often, ordinary slate is used, but if it is planned to fit the duck house into the overall landscape design, then flexible or ceramic tiles or corrugated board of a certain color are used.

If an attic compartment is provided in the house, then additional roof insulation is not required, but if a shed structure without an attic is arranged, it is necessary to thermally insulate the under-roof space, securing, for example, polystyrene foam 30 ÷ 50 mm thick or penofol. After fixing the insulation material, the roof is sheathed from the inside with plywood sheets - they are fixed with self-tapping screws on the rafter beam. It is possible to provide for a plank filing of an insulated ceiling.
Floors in duck rooms
The floor in the duck room can be earthen, concrete or wood.
- Earthen floors are too cold for the winter period, and because of this, the entire room will cool down. In addition, if the soil is not compacted, dirty slurry will be created in the room, especially near water containers. But ducks respond well to an uncoated earthen floor if warm bedding is laid on it.

- A concrete floor is more hygienic and easier to clean, but it is also cold and also requires a thick layer of heat-insulating natural materials such as hay or straw.
- Wooden floors are warmer, but it is necessary to close up all the cracks in them, or use a tongue-and-groove board for flooring. In addition, it is recommended to raise the floors on logs above the ground by at least 100 ÷ 150 mm. But, even if a plank flooring is made, it will still not be possible to do without insulating flooring materials in winter.
Video: building a frame barn, quite suitable for a poultry house
Interior arrangement of a poultry house for ducks
After the construction of the building for the poultry house, the second task that will have to be solved will be to provide it with everything necessary.
This process is mandatory, since ducks need to create the most comfortable atmosphere for normal growth and weight gain.
Duck Room Lighting
From proper lighting in a room for keeping ducks, the performance and activity of birds largely depends, since they are quite demanding on this factor. In order for sunlight to get inside the house for as long as possible during the day, windows must be provided on the south side of the building. At the same time, windows should not be too large, and they should be located at the top of the wall so that ultraviolet penetrates into the room, but the sun's rays do not fall directly on the ducks. If the windows are installed correctly, it will help to significantly save energy costs for artificial lighting.

However, it is necessary to take into account the fact that in the autumn-winter period only natural light will not be enough, since light must be present in the room for at least 14 hours a day. Therefore, it is necessary to conduct electricity in the poultry house.
To illuminate the "duck house" light bulbs are placed under the ceiling. Both the wiring and the placement of fixtures are planned in such a way that there is 5 watts of lighting per square meter of the room.
Proper lighting prolongs the activity of the bird and stimulates the functioning of its internal organs, which significantly increases egg production.
Space heating
Ducks tolerate winter temperatures quite well due to feathers tightly fitting their bodies, down under them and a layer of fat. But still, it is desirable that the temperature in the wintering room for ducks does not fall below 12 degrees, since with severe hypothermia for a long time, the bird may die.

Therefore, if winter temperatures in a particular region fall below 8 degrees (that is, almost everywhere), the house will have to be heated.
Heating can be carried out in different ways - this is infrared lamps hanging a meter from the floor, and if the room is large, then a water circuit is connected to the stove, which includes radiators.

This diagram shows a variant of how you can organize heating in a large poultry house. The numbers show the following elements of the system:
- Heating boiler or furnace with water circuit.
- Thermal storage tank installed in the boiler room of the house and having a pair of taps to the poultry house
- Circulation pump.
- Thermostatic switch that turns on the pump when necessary - when the temperature in the house drops below the set level
- Heating radiators.
In the event that the stove is planned to be installed directly in the house, it will need to provide a separated corner for it, into which ducks cannot enter.
If it is decided to heat the duck room with infrared lighting or conventional electric lamps, it must be taken into account that one 250 W lamp is needed per 8 ÷ 10 square meters.

The lamps are installed in shades that reflect light and heat, and the height of the lamps suspended above the floor should be adjustable - when the temperature drops, the lamps go down, and when the temperature rises, they rise up to one meter and higher above the surface.
Another way to heat rooms for keeping animals and birds is, but in this case you will have to seriously spend money not only on the purchase of appliances, but also on a regular payment for electricity.
When installing any of the types of heating, it should be remembered that none of them will be effective without proper insulation of the capital structure of the house, since the heat simply will not linger inside the room.
Floor mats
Although ducks are resistant to cold, if they stay on a cold floor for a long time, they can frostbite their paws. In addition, severe hypothermia often leads to the death of the bird. Therefore, it is very important to make warm floor mats, 100÷150 mm thick.

Winter bedding should be dry, soft, not injuring the bird's paws, warm, quickly absorbing moisture, and also absorbing unpleasant odors. Therefore, for it, small or medium-sized sawdust, straw or hay, ash, or a mixture of several components are most often chosen. In the summer, you can cover the floor in the duck room with river sand.

Bedding should always be dry and not have a musty smell, as harmful insects can appear in a dirty heat-insulating natural material that will spoil the feather and down cover of ducks.
The bedding is changed as needed, but it must not be allowed to be damp, otherwise it will lose its insulating qualities.
Room ventilation
Ducks do not tolerate drafts well, so ventilation should be carried out only with the help of windows located high above the floor. In winter, this event is held as needed, but in summer, ducks are mostly outside during the daytime, so at this time you can open the door to the house wide open.
Be that as it may, ventilation in the room where the bird is located must be carried out without fail, otherwise the litter will not dry out well, and pathogenic microflora may appear in it.
Bird walking areas
Walking a bird is a mandatory exercise that should be carried out at any time of the year. In summer, a paddock fenced with a net will be organized for walks, where all the elements necessary for ducks will be provided. In winter, ducks are recommended to walk on the site if the temperature outside does not drop below 10 degrees, and they are released for a walk for a short time.
plastic pond

The winter playground should be protected from the wind, and also have a roof that will cover the birds from rain and snow. And in order for dirt to form on it, it is recommended to fill it with a mixed mass of sand and sawdust. These materials absorb moisture well, and, being in a mixture, do not form a hard crust at low temperatures. Before releasing the bird onto the site, the backfill must be leveled with a rake, while breaking the frozen lumps.

Some farmers necessarily organize a kind of covered corridor with a wooden floor in front of the entrance intended for birds, which in winter serves as an excellent walking area, as it protects the bird from wind and rain, and also allows you to get inside the premises at any time. With the construction of such an extension, several problems are solved at once - the bird will not freeze its paws, it is not in a draft, there is no need to take water and food out into the street, since the entrance to the room is open, and ducks can always go inside.
Drinkers and feeders for ducks
Duck feeders vary, but are usually long wooden or plastic troughs. Some farmers, taking into account all the nuances, develop their own designs of feeders, which are both convenient for the bird and allow you to keep the feed clean, without foreign contaminants getting into it. For their manufacture, 100 mm plastic pipes are used for laying sewers, in which the required number of holes are cut.

Wooden and homemade plastic feeders are good for dry loose food, while wet food is best placed in containers made of stainless steel.
The feeders are made long so that the ducks can all eat at the same time, do not climb on top of each other and do not fight. If a wooden long feeder is made, then it should be divided in two from above with a bar. This design was invented so that the ducks could eat, approaching the feeder from two sides, and only the beak of the bird passed between the bar and the wall of the container.

Containers are installed on the floor, in places to which there is free access from all sides. There should also be the required number of feeders on the walking area. It should be noted that ducks do not differ in accuracy and scatter food throughout the room, therefore, in order to save money, it is recommended to pour a small amount of food into the feeder, and when it is eaten, add more.
As a drinking bowl on the site, you can use an ordinary plastic basin filled to the brim with water, since it is not scary if it is spilled on the ground. In the poultry house, it is better to install a drinking bowl, which will be replenished with water as it decreases from the lower tank.

But, we must not forget that ducks are waterfowl and they should always have free access to clean and fresh water. Since each of the birds drinks up to 600 ml per day. liquid, its reserves must be constantly replenished. Automatic drinkers will be the best option for indoor installation - they will not pollute the water, and the bird will not be able to climb into the basin.
Ponds for ducks
As mentioned above, water is the native element for ducks, therefore, if there is a natural reservoir nearby, the poultry house should be built closer to it so that the birds have the opportunity to take water procedures more often in natural conditions. If there is no reservoir nearby, it will be necessary to make at least a small artificial one, and it is better if it is located on the walking area.
If there are few ducks, then an old bath is perfect for making a pond, which can be connected to the sewer system, which will make it easier to replace the water in the tank as it gets dirty.

The bath is dug into the ground in a place convenient for the bird. If there is a desire to expand such a “pond”, then an additional container made of polypropylene or rubber is installed under the bath, but of a larger size. Then they are combined with each other, covering with a dense plastic film. Thanks to this design, a different level of depth is obtained. After this, the edges of the reservoir can be decorated with flat stones, and then the container can be filled with water.
If there are a lot of ducks, then the pond is made differently for them. For him, a pit is dug one meter deep. In the case when it is planned to drain water into the sewer, a drain pipe is laid to the bottom of the future reservoir. Then, the pit and its edges are reinforced and concreted by 150÷200 mm. After the concrete hardens and gains strength, the sewer hole is closed with a stopper, and the resulting container is filled with water.

So that ducks on their paws do not bring dirt into the water, it is recommended to remove the soil around the pond to a depth of 80 ÷ 100 mm, and then fill the resulting depression with fine gravel or expanded clay.
The simplest option - instead of concreting, the pit of the reservoir can be covered with a special dense plastic film, which is fixed along the edges of the pit with stones. This version of the reservoir is much easier to make, but in order to pump water out of it, and this will have to be done quite often, you will have to purchase a special drainage pump.
wooden box

Another arrangement option can be a polypropylene finished container, which can be multi-stage or have the same depth in the middle and closer to the edges. The tank is also installed in a pit prepared for it, it can be connected to the sewer, or the water can be pumped out using a pump. This option can be called the most convenient, but, however, quite expensive for the price.
Ash baths
Since ducks are kept on the floor, it is periodically necessary to arrange an ash or sand-ash bath for them. This will require an open box with a size of 1250 × 1700 mm and a height of approximately 200 ÷ 250 mm.
To carry out this procedure, the box is filled by ⅔ with a mixture made of ash and sand, taken in a 1: 1 ratio. Then it is installed on the paddock or in the poultry house.
Ash baths should be carried out once every three to four weeks, or even the box should be left at the complete disposal of the birds. The mixture of ash and sand in this case must be changed once a month. When replacing the mixture, the box must be thoroughly disinfected with a weak solution of potassium permanganate.
Nests for laying eggs
Nests are necessary for ducks with constant egg production so that they can lay eggs in a calm environment. Such nests are made of bars and boards, sheathing their side walls with plywood. The floor of nest boxes rises above the ground by about 100÷120 mm and consists of boards fixed at a distance of 5÷8 mm from each other. Insulation material is laid on the boards - it can be hay, straw or large sawdust. In the future, the duck herself, before laying, will try to create comfortable conditions for the eggs, and then for the ducklings, warming the nest with down. In such conditions, she will feel warm and safe.

The size of such nest boxes is usually 250×350×400 mm (width, height, depth). The front part of the nest box is equipped with a small threshold, 50 ÷ 60 mm high - it is necessary so that the eggs cannot roll out. The nests in the poultry house should be half as many as the ducks, for example, 4 ÷ 5 nests will be required for 8 birds.
These devices are usually mounted in a complex of two or three pieces and installed along the walls, away from the entrance and from the feeders, so that the nests are not affected by the draft in any way, and there is no fuss around the masonry.

It should be noted that if it is not possible to make boxes for nests, then it is quite possible to adapt strong carton boxes, baskets or even plastic basins.
In the event that ducks of meat breeds are purchased that lay eggs seasonally, they will not need to build nests for them.
So, due to the fact that ducks are hardy and unpretentious, any site owner, even one who does not have experience in poultry farming, can start breeding them. However, you should not buy a large number of ducklings at once - it is better to try to start with 5 ÷ 8 pieces, since it is possible that such an amount will seem too much due to inexperience.
Indo-ducks or Muscovy ducks are quiet and picky birds. That is why many breeders choose this particular productive breed. Are there any features in their content and how to equip a room for Indoutok - we suggest talking about this!
Quite a lot has already been said about the unpretentiousness of Indoutok. However, for their comfort, some minimal modest conditions are also needed, and, of course, it is necessary for birds to create them. Be sure to remember that the Indian is from warm South America, and therefore does not always tolerate severe frosts well. Despite the fact that ducks are waterfowl, preferring to spend most of their time on the run and near water bodies, they need a warm room. Otherwise, even undemanding Indians can get sick and even die.
Floor and walls
Considering that Indoutok must be protected from hypothermia, a warm floor is one of the main conditions. The warmest and most environmentally friendly material for the floor is wood. However, this raw material is also perishable, especially given the dampness that duck droppings will produce. However, you should not completely abandon the wooden floor. You can raise the floor from the ground by 10-15 cm, cover it with boards, and put, say, old linoleum on top. It will protect the tree from unnecessary moisture.
The floor can also be made of concrete. But in this case it will be cold enough and you will need a solid layer of bedding so that the paws of your Indoutok do not get cold. The walls must also be insulated. For this, any organic material is used: sawdust can be poured into the wall, mineral wool or polystyrene can be used. However, cotton wool or polystyrene must be hidden in the space between the walls, so the walls are lined with clapboard or chipboard from the inside.
If your poultry house is brick, then it is advisable to insulate the walls from the outside with foam plastic and paint from the inside. If the winter in your area is frosty, the room with the Indochki will need additional heating.
nests
If you plan to breed Muscovy ducks, then, of course, you can’t do without nests in this case. Nests for Indoutok are placed on the floor away from aisles or overly lit places. Remember that Indian birds are meek and shy and require solitude and peace during incubation or laying eggs. And also darkness, so if your house is heavily lit, artificially create shadow zones in it and place the nests there. This should be done around the end of winter, it is from this period that the breeding season starts for Muscovy ducks.
There are no strict requirements for what nests should be. Anything can be adapted for these purposes: old boxes, boxes, baskets, flasks, old dog kennels. You can put together a nest of their slats or tesa, it is desirable that it has a threshold to hold the masonry and a roof, so the bird will be calmer. Inside, the structure should be carefully lined with straw, and the duck will report down itself. The number of nests should correspond to the number of birds, so there will be no disputes and fights between females.
Drinkers and feeders
Of course, no poultry house is complete without drinkers and feeders. There is nothing special in the designs for drinking and feeding Indoutok.
You can use wooden long feeders - troughs installed along the walls of the house or walking area, or make feeders from plastic bottles. Drinking bowls can be very diverse: purchased or made independently.
For example, consider an autodrinker from plastic bottle or banks. Of course, a simple basin of water will also work. However, remembering ducks' addiction to water, do not count on the fact that the water in it will remain clean for at least half a day. In this case, nipple drinkers are a way out of the situation, the water in them is always clean. Useful video for everyone, or just planning it, next!
We make a nest of Indo-outka
Making nests for Indo-outs with your own hands is simpler and now you will see for yourself.
Tools and materials
We suggest paying attention to the construction of wood, for sure, slats or tes can be found in everyone's household.
So get ready:
- wooden slats or just any pieces of wood and bars in the amount of 4 pieces;
- nails or screws;
- measuring tape, hammer and saw;
- straw for filling.
Step-by-step instruction
- First of all, let's decide on the size. Optimum dimensions of the nest for Indoutka: 400 x 500 x 250 mm.
- Sort the slats and cut them according to the indicated dimensions. Any softwood, chipboard or OSB can be used.
- Knock down the slats or wood between each other, using the bars as supports.
- Make a threshold and leave enough space for the hole so that the bird can safely enter the nest, but so that not much light gets there.
- Place the nest in a dark corner, cover the bottom with plenty of bedding. And on top, put either a piece of chipboard or a piece of slate so that the nest has a roof. The main thing is that it is stable and does not fall on the bird.